Showing posts with label Gift Wrapping. Show all posts

Did You Know It's A Tape Dispenser???

Pin It!


Did you know that you can use the Tim Holtz tissue tape dispenser to dispense regular Scotch tape?
This weekend I needed to tape up a gift and was one hand shy. Isn't everyone when they are wrapping a gift? I was trying to hold the paper with one hand and rip off the tape with the other and kept failing. I thought why don't they come out with a dispenser like Tim's for tape (like the packing tape but smaller) Well I ran up to my studio and grabbed my tissue tape dispenser and gave it a try and what do you know it worked like a charm!!! It's the perfect size and make my gift wrapping quick and easy. Now I'll have to get another, one for my tissue tape and one for my regular tape.

Hugs & Kisses For All - Favor Cake

Pin It!


This gorgeous cake is entirely made of paper, well... it has a chocolate center if that counts!  I needed to come up with something fabulous for Kyler's Christening favors and I wanted to make it special.  So I started creating these cake slices...one thing led to another and I ended up with a beautiful 3 layer cake with some cupcakes gathered at the base (possibly looks like a 4th layer?).  Whenever I'm working on a project I usually don't have my entire project mapped out ahead of me, maybe I have a general idea of what I want to do and then just let creativity take over. 


 Both the cake slice box and the cupcake box were cut from the Eclips Albums, Bags & Boxes #2 cartridge.  I cut the cake slices in two different sizes to get the layered cake effect and then topped it with one of the cupcakes.

  Each one has is filled with HUGS & KISSES from baby Kyler!!!


I have always loved Penny Duncan's creations and she had just the perfect cross for this occasion. And, of course I had to dress up those sweet little cupcakes! I used the Flower Burst punch from EK Success to adorn the all the sides.  A perfect fit! 


The flowers on this cake were all cut with the Eclips using the Albums, Bags & Boxes #2 cartridge.  I liked that I could cut the flower at a variety of sizes to give them a more natural and nonuniform shape.  That is as natural as blue flowers can be.  I cut them all from white card stock and then sprayed them with my homemade shimmer mist.  Once all my flowers were cut, I rolled them while zoning out in front of the TV.  A quick spritz of water before shaping helps soften the paper making it easy to mold just how you want, even on the tiniest of flowers. 


I just love how this favor cake turned out.  I see making many more in the future!  So many ideas running through my head...the wheels are spinning... 

Don't worry there will be a video coming in the very, very near future on how exactly I made this.  I just wanted to share the pics right away with you.  But I promise you it will be coming :)

Diaper Creation Centerpieces & Create Your Own Note Pad Video

Pin It!

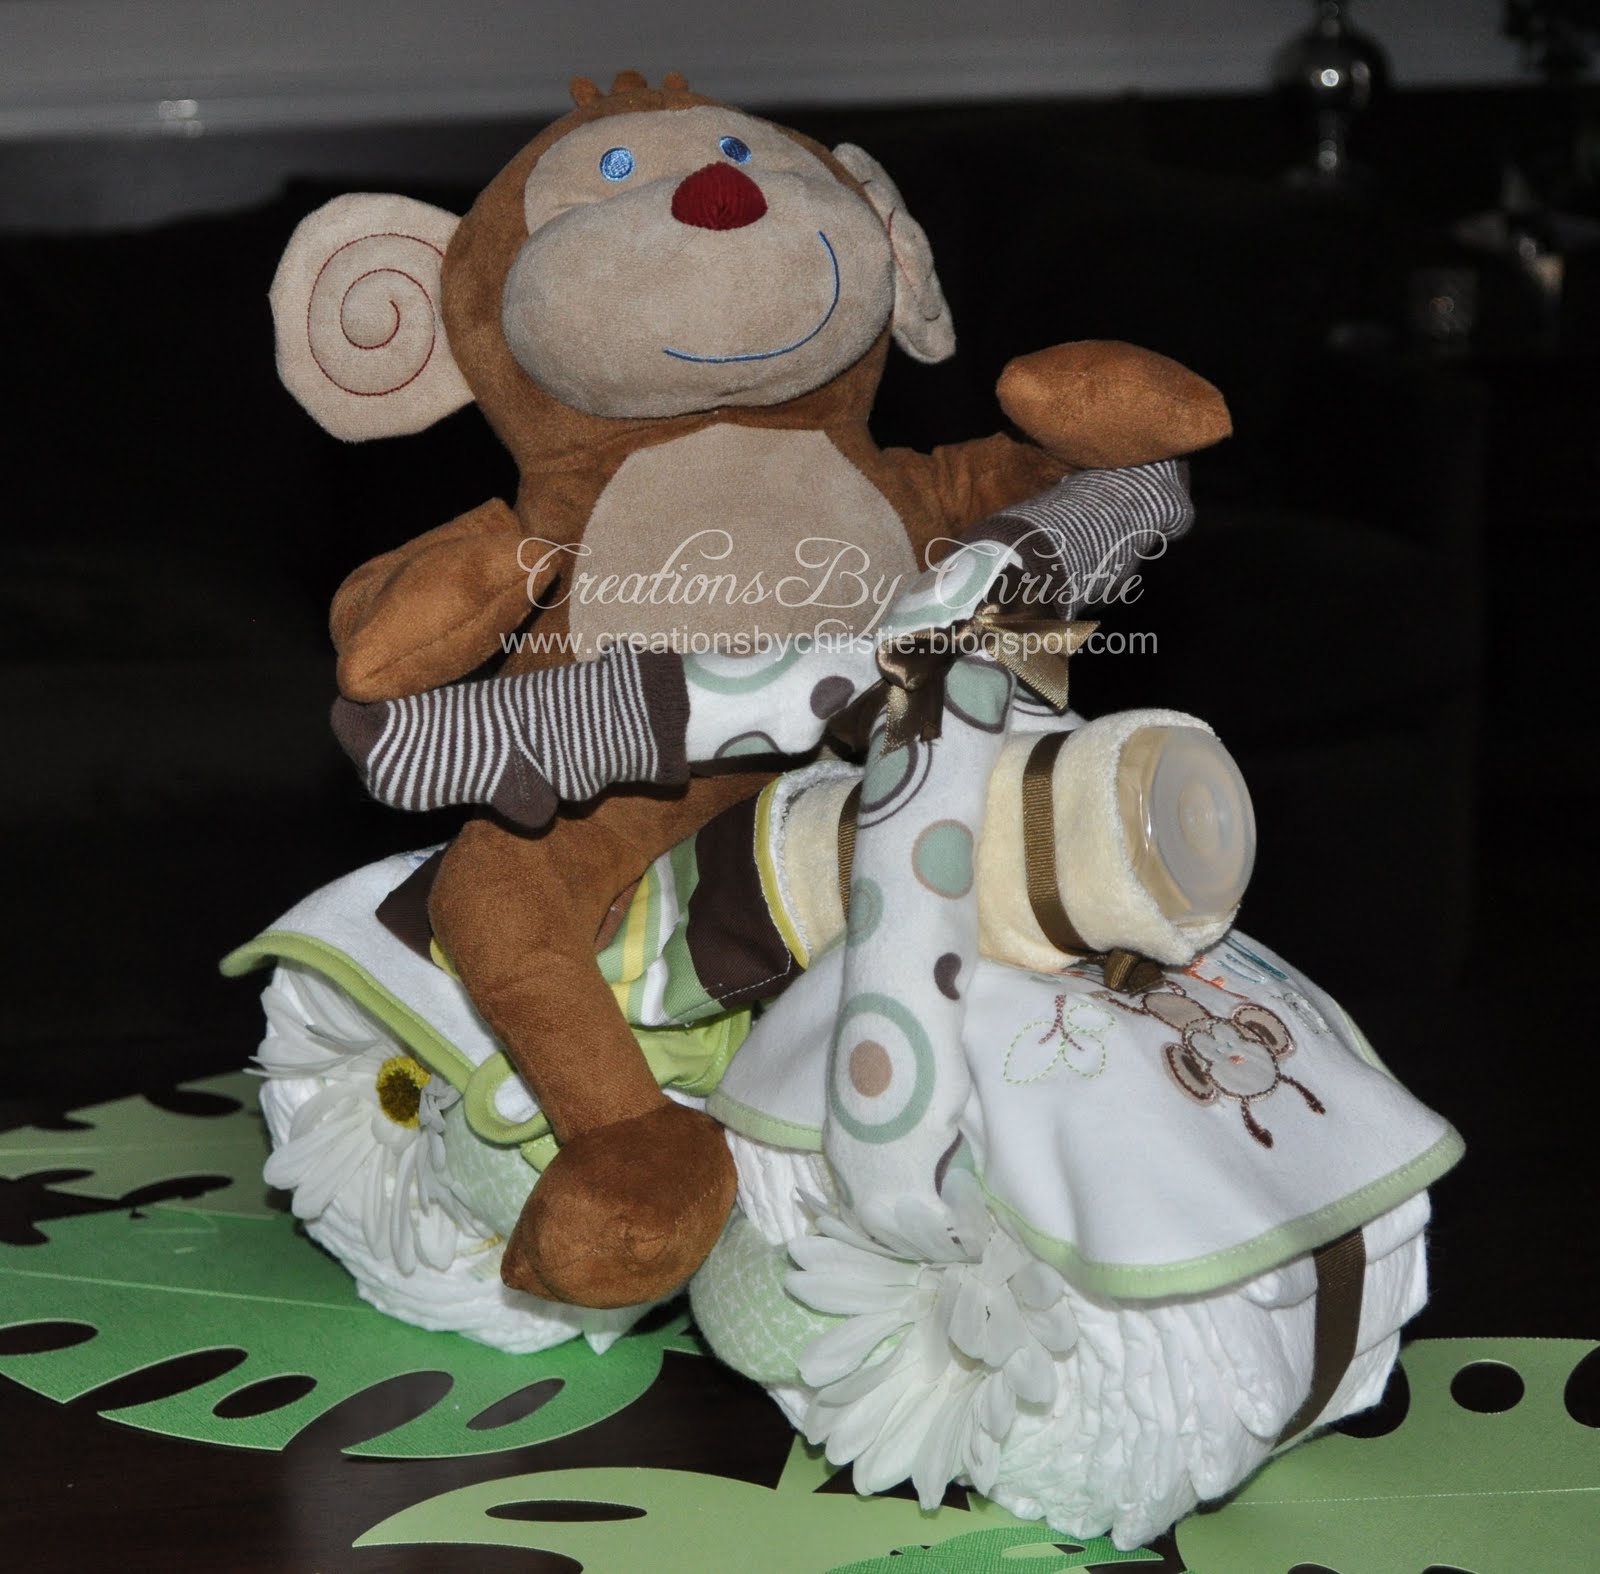
Bicycle with Monkey I made all of the adorable Diaper Creations for the shower I hosted this past weekend. As you all know I am so excited for my Grandson's arrival. I made these 6 cuties as the centerpieces for the tables. I cut leaves from the Lifes a Beach Cricut cart. to place under each. To add to the fun I created a game for them. Everyone guessed how many diapers went into each creation. The winner won a special prize. On each table I put a ballot box and a note pad I made myself. I made a video tutorial to show you how I created the custom notepads.
I had so much fun creating them that I made more to sell in my Etsy Store. I something for everyone -baby boys, girls and even unisex (incase they don't know the sex of the little one).
There is a large variety of sweet furry friends and bikes, trikes and 4-wheelers to choose from. Please check them out. You may find something that you just need to bring to the next shower that you are attending. They make great centerpeices and a wonderful gift for a new Mom to be.
Above 4 wheeler (ATV) with Frog
Below Tricycle with Lion
3 Layer Cake with Monkey
Baby Carriage with sleeping Monkey...Shhh
Car
Below are the ballot boxes and note pads that I created for each of the Diaper Creations.

I put each on the table with the corresponding centerpiece.


Enjoy the video tutorial on how to create your own Note Pads

Handyman Hero

Pin It! When my Wonderful Dad retired from his career at USG I knew I had to create something extra special for him. He is always helping everyone around him. He is definitely my HERO!!! Those of you that follow my blog or know me personally know that I am always like to make the presentation of my gifts as meaningful and charming as the gift itself. For my Dad, who is always building or creating his own creation (only on a much larger scale..like room additions, etc.) I thought that my own gift creations were suiting to him.

I wrapped the gifts in plain black gift wrap patter and then tied the yellow ruler ribbon around it. I adhered one or two "tool" sticker to each package.

The "big" gift of a toolbox filled with hugs and kisses (Hersheys) and an IPOD got a special wrapping treatment. I chose a lot of different fonts from my Cricut and also from fonts that I have on my computer. I used the Sure Cuts a Lot (SCAL) or the Make the Cut (MTC) along with my Cricut. I thought of a bunch of words that described my Dad and then cut them in vinyl. It was a big hit.

The last gift was more for my Mom than for my Dad, I think. I used a long picture frame, I took out the glass and covered it with chalkboard paper. I put the chalkboard covered glass back into the frame and then added letters cut from my Cricut. I used Glossy Accents to glue the mini tools to the board. Now my Dad has a custom "Honey Do List". At the party everyone had fun writing there projects that they want my Dad to do at their house.

Butterfly Birthday

Pin It!


Wrapping a gift is as much fun as giving it. I  die cut this flower out using the Sure Cuts A Lot. I inked the edges of  pink paper with Tim Holtz Distress Inks in Worn Lipstick and Aged Mahogany. I inked the entire leaf with Forest moss since it was cut in pink paper and I didn't want to cut it again. I inked the stem in Vintage Photo. I them sprayed all the items with homemade perfect pearl mists to add shimmer. The butterflies were created by first cutting 2 butterflies out of white cardstock using the cuttlebug die cut. I then used a brayer and rolled Brilliance Rocket Red ink on the embossing folder, I then embossed the butterfly using my Cuttlebug.  I sprayed them with Tattered Angels Glimmer Mist in Gold to achieve the color I was looking for. I wrapped the gift with some wired beads and left one end long so that one of the butterflies could float above the flower. I  love the final look.

Baby Boy Hampton

Pin It!


I used the Make the Cut program for the Cricut to cut the Baby Boy Hampton using one of my fonts I had on my computer and I also cut the flower which I found on the web (I'm sorry I don't remember which site, if I figure it out I'll be sure to post it). I wrapped the present in plain white glossy wrapping paper and then cut the plain green and striped blue scrapbook paper with a decorative edge. After tying the sheer blue ribbon on the gift I ran the lettering through the Xyron sticker maker and placed it on the bow. Voila!

Baby Jade

Pin It!


The invitation to this baby shower was in brown and pinks and I love that color combination so I used that in wrapping my gifts. Since the mother-to-be already knew she was having a girl and had the name picked out I was able to incorporate that in as well. The baby feet gift tags were cut from the New Arrival Cricut cartridge. I used my Cuttlebug to cut the "Baby Jade" out using the Hippie Chick die cut which I then ran through my xyron sticker maker and placed them on the ribbon. I love how they turned out!

Chocolate Truffle Boxes

Pin It!


I made these chocolate truffle boxes out of the Tags, Bags, Boxes and More Cricut cartridge. When making the label I first found the placement for the wording, printed it on 8 1/2 X 11 white cardstock and then cut the out using the Fabulous Finds Cricut cartridge. I then shadowed it and backed it with black cardstock. Once all the boxes were made they were assembled and were able to be stored until the wedding. The truffles were inserted through the bottom of the box so the bows didn't get messy.

Follow Me on Pinterest

Search This Blog

Grab My Button


Contact Me At

Archives

MyFreeCopyright.com Registered & Protected