
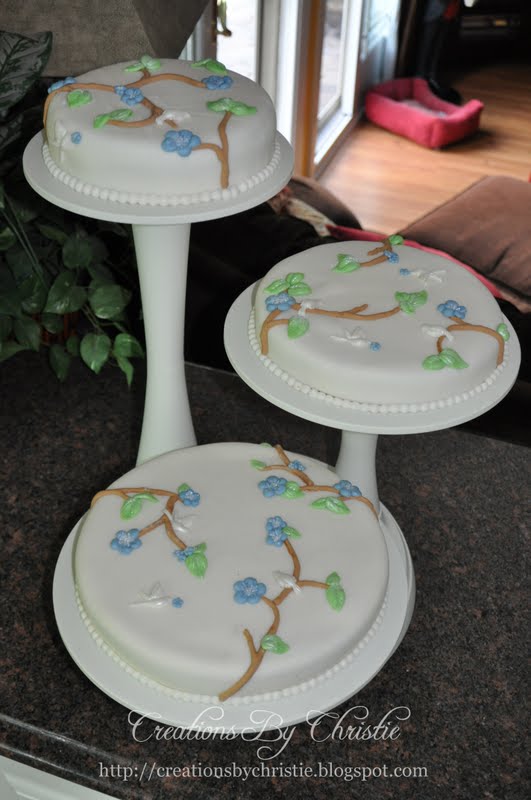
I planned on posting this last week while I was away at the Creative Connection Event but I was unable to get my laptop to connect at the hotel. I learned that you can't do much on blogger with a Ipad, which was my only source of Internet connection for that week. Anyways, here it is... the 3 tier fondant cake I created for Kyler's baptism. I know the first question every one is going to ask is where did I get the stand... I bought it at Michael's and used my coupon for it. P.S. there is a smart phone App from JoAnn and Michael coupons now.
I want to get started by stating I am not an expert at baking or decorating cakes. I only make them for my family occasions, occasionally. Usually I'm so busy I run out to the store and buy anything that looks yummy. But since Kyler's Christening was so special I wanted his cake to be special too. So I decided to make one for the celebration. And I'm glad I did. The bottom tier was 14" and was made of a Red Velvet cake. My favorite! Mmmm!!! The middle tier is a 12" White Cake and the top tier is a 10" chocolate cake. I am by no means a chef or a baker but just wanted something beautiful for his Christening. I could bake a cake so I gave it a go! I think it turned out pretty dang good, if I say so myself. Personally, I think fondat "frosting" is kind of thick and tasteless I served the cake with loads of whipped cream and sliced strawberries. That way you still get lots of flavors and don't miss the creamy texture that fondant lacks. Enjoy the pics!

Top 10" Chocolate tier
The picture below is the middle tier, a 12" white cake.

This next one is the bottom layer, the 14" Red Velvet cake. It takes some arm strength to roll out the fondant for that one. LOL I had my husband help. I found it incredibly useful to use the Wilton tools, rolling pin, levelers, etc. when making the cake. I got everything at Michael's and Jo Ann's.

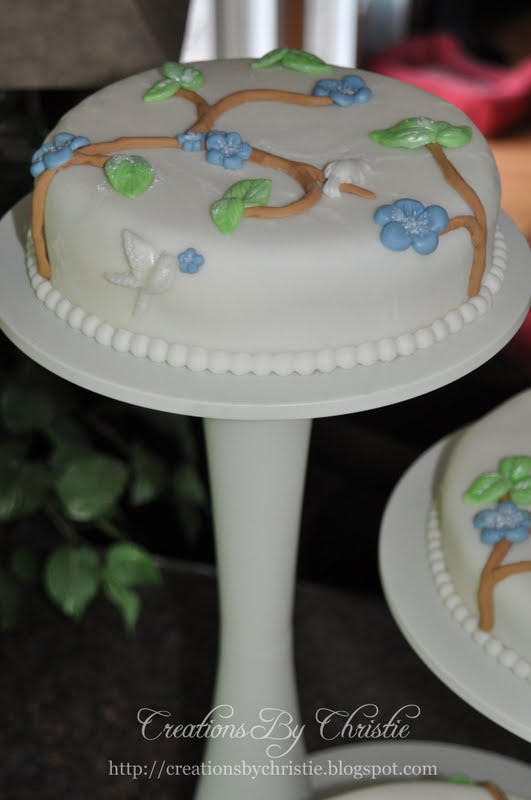
Here's a couple close ups of the birds on the branches. I used a mold to form the birds, branches, flowers, and leaves. The mold can be found also in the cake department at your local craft store. when coloring the fondant add a touch of shortening to keep it from becoming sticky. I found out the hard way. My final touch was a bit of edible glitter on the centers of the flowers and leaves.


I hope you enjoyed the pics. Don't be afraid to try something new.
You never know what you can accomplish if you never try!


10 comments:
These turned out great! Nice cake decoration for a christening; I like the molded birds!
Stunningly elegant. Love the birds and the branches.
Christie, you are my freakin hero! Your projects never cease to amaze AND inspire. I'm ready to run off to Michael's right now! haha. BEAUTIFUL cake.
Peggy in Portland
Gorgeous! What a thoughtful way to show your love and support to the family.
OMG that is just absolutely beautiful! If I were there I would not able to eat it as I would just want to stare at it. (g) Truly a work of art! Great idea with the tiers. I cannot even get a layer cake even no less frosted properly :O.
Your really are multi-talented.
KimMJ
bast830@comcast.net
So pretty!!!! And you did a amazing job....and I'm sure your guest were delighted with all your hard work....well done!!!!
Wow...many talents!
Hey, it's your friend Christie from TCC! I hope you had safe travels home. I can't wait to blog about the event. I'm still wiped out!
christie daugherty
www.stampshacklady.com
Christie, lovely cakes and I'm digging in the book cover tutorial! Glad I had the chance to meet you during TCC!
You must be on your cruise this week with Tim and Mario! Dying to hear all about it when you get back!
They turned out great! I never thought of doing coffee mugs! Sounds like a blast! Can't wait for more pictures!
Sandy
Post a Comment
If you have a question please leave your email so I can respond, Thank You :)